
Take a look at my quasi-DIY solution for upgrading the size of your tank to better fit a large turtle after it outgrows most commercial glass aquariums. You’re not actually building much of anything yourself, but you will be going on a little bit of a scavenger hunt for all the pieces you’ll need to make your turtle’s new home and doing a touch of modification. There are tons of fully do-it-yourself turtle tank ideas out there for those who are super handy with power tools and have a lot of time on their hands, but if you just need a tank that gets the job done and you don’t have hours and hours to spend putting it together, this solution will work a treat.
The pros of this approach are: cheaper than a glass aquarium setup, easier than going fully do-it-yourself mode. The cons of this approach are: less aesthetically pleasing/more industrial look than a glass aquarium setup, probably just a little more pricey than if you build everything from scratch.
First, the tank itself. Standard wisdom says that for every inch of turtle (standard carapace length), you need 10 gallons of water. Some argue this means total water, meaning if your basking area is inside the tank you need a bigger tank to have the appropriate gallonage; others say that this refers to the gallon size of the tank. I’ve found that as long as you have a powerful enough filter and do regular water changes, you can cheat the tank size a little bit. For the purposes of this exercise, the turtle in question is 7-9″ long and you’re looking to get him into a 75-gallon aquarium.
| What it is | Where to get it | Price |
| 75-gallon glass aquarium & stand together | Petsmart | $549.99 |
| 75-gallon glass aquarium & stand sold separately | Petco tank Petsmart stand | $209.99 +$219.99 $429.98 |
| 110-gallon stock tank (popular DIY turtle tank) No stand as it will sit on the floor | Tractor Supply | $84.99 |
| 70-gallon storage tote No stand as it will sit on the floor | Home Depot | $69.98 |
Now, obviously you can buy used tanks and stands and probably find them cheaper than what I listed here as off-the-shelf, brand-new prices. Still, though, you’re probably not going to beat the price of a tote bin. Stock tanks like they use for farm animals are a popular choice for do-it-yourselfers in the turtle world, and not that much more expensive than tote bins of comparable size. They also go up to much larger sizes than aquariums sold at general pet stores and any tote bins I have been able to find. However, due to their shape, the pre-made dock I recommend won’t securely fit, so you would have to spend a lot more time building your own.
Nota bene: Water is heavy and exerts a lot of outward pressure on containers it is in, which is why products that are officially rated to handle its weight such as glass aquariums and stands are so expensive. The tote bin is not manufactured with the idea that it would be holding water weight, so its official rating is only a fraction of the aquarium setups’ ratings. That being said, I use tote bins to hold water beyond their rated weight all the time and have yet to have one burst on me (knock on wood). The minute that happens, I will take this post down…as soon as I’m done cleaning up the mess that would undoubtedly create. I think because tote bins are made from molded plastic and don’t have sealed edges with the potential to leak, plus you’re not trying to lift them with the water inside, they hold up to the pressure of water just fine. They may bow out a little, but that isn’t a problem unless you notice the bend becoming severe and/or starting to crack.*
Tote bins and stock tanks big enough for large turtles are opaque, meaning that if you like looking at your turtle from the side through the glass, you’re out of luck. They also don’t have stands, so they must sit on the floor. This is just fine for viewing your turtle from the top, but will make your filtration choices more limited (I’ll get into this more later).
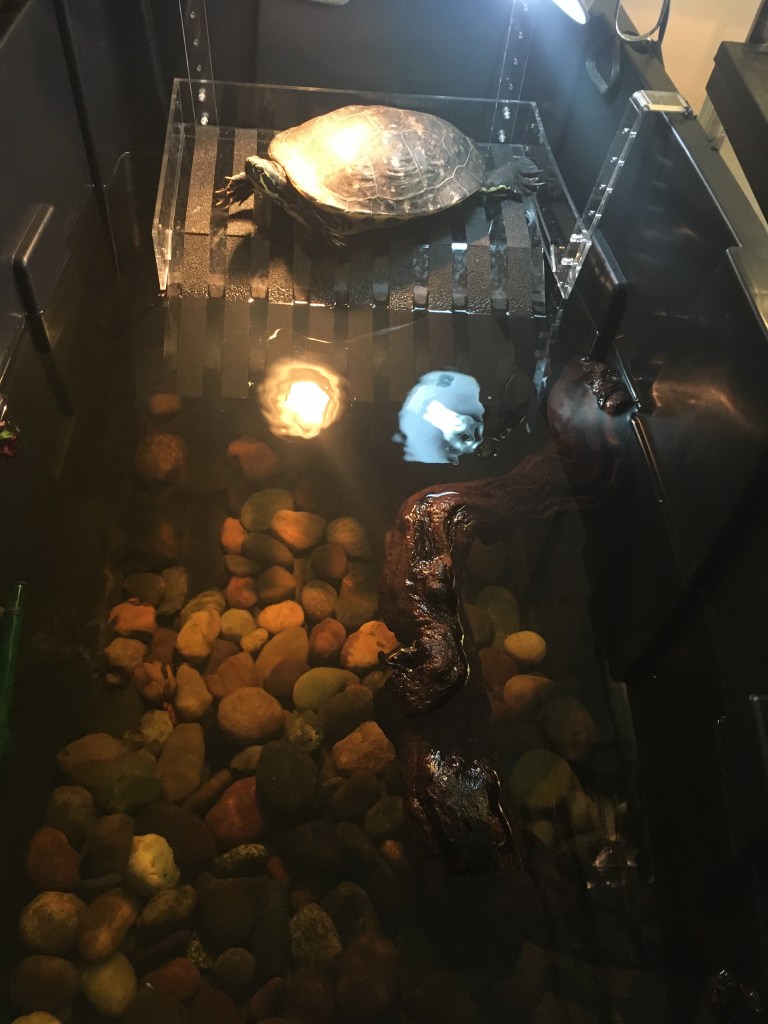
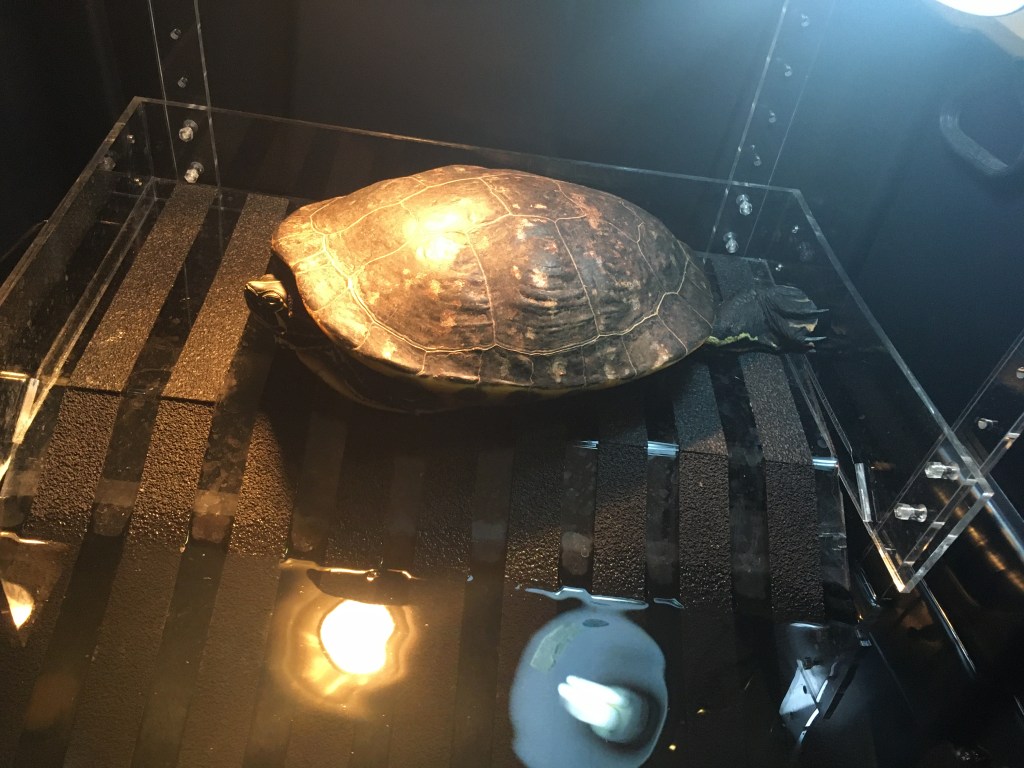
After you get the 70-gallon tote bin for the tank, you’re going to need a dock. You’ve probably noticed that any of the floating ones and suction-cup ones you can find in stores will sink as soon as they hold the weight of your turtle, meaning his plastron will never fully get dry, which can encourage fungal growth and cause health issues. You’ve probably also guessed that the tank-topper ones either don’t fit well on top of larger aquariums and/or the ramp for the turtle to get up there is too small and/or create a new problem of having to seal off the rest of the top of the tank so that the turtle can’t escape from the water’s edge. Piling rocks or logs in there to create a basking spot takes away from swimming space, so that’s not a great option either. I have been trying and making different dock designs for years and was never completely satisfied. At long last, a company has finally come up with a dock that actually works for larger turtles: LaBrinx Designs. I’ve tried all three sizes their hanging dock comes in, and I recommend the largest one they have: Extra Large Wide. It is 16″ wide and 15″ deep, and its adjustable height can go as low as 11″ from the top of the tank. Now, if you have a very large turtle that is also an escape artist, you may want to duct-tape the screen from your old aquarium across the top of the basking spot to create a kind of ceiling so that your turtle can’t just climb out. I had to do this with one of my other turtles on a different tank, but the turtle I put in the setup described here is less inclined to wander so I didn’t bother.
You can buy their extra large wide turtle dock for $74.99 either directly from their website or from Amazon, depending on your preference. It’s the same price and shipping speed either way pretty much. This may seem like a lot of money for a turtle dock, but unless you have a gigantic turtle, it’ll be the last dock you ever have to buy, and it’s totally worth the money. It’s sturdy, well-made, easy to put together, and best of all, big enough for an adult turtle.
The one drawback of this dock is that because it was designed for extra-large aquariums, not tote bins or stock tanks, the hook that holds the dock in place doesn’t quite fit over the edge. This is where the DIY part comes in. Using a dremmel tool or other small power tool, cut a slot into the lip of the tank so that it is completely secure when you install it.
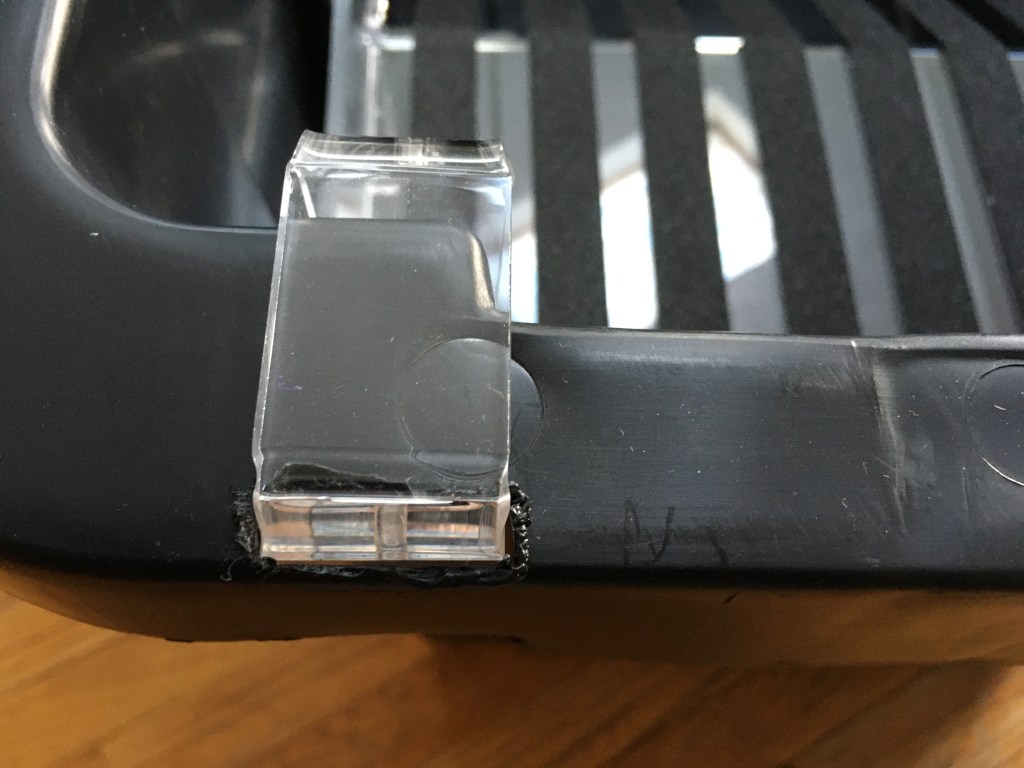
*As mentioned before, water makes the edges bow out, so cut the slot deeper toward the center of the tank than you think you need. Otherwise, you’ll end up with this problem: water pressure on the tank bowing out enough to pull the side of the dock from the platform. This happened to me the first time I tried to do this setup. Surprisingly, the half-detached dock still holds the turtle’s weight for quite a while without fully breaking. Still, you probably want to avoid my mistakes if you’re going to spend that much money on a piece of equipment you want to use forever.
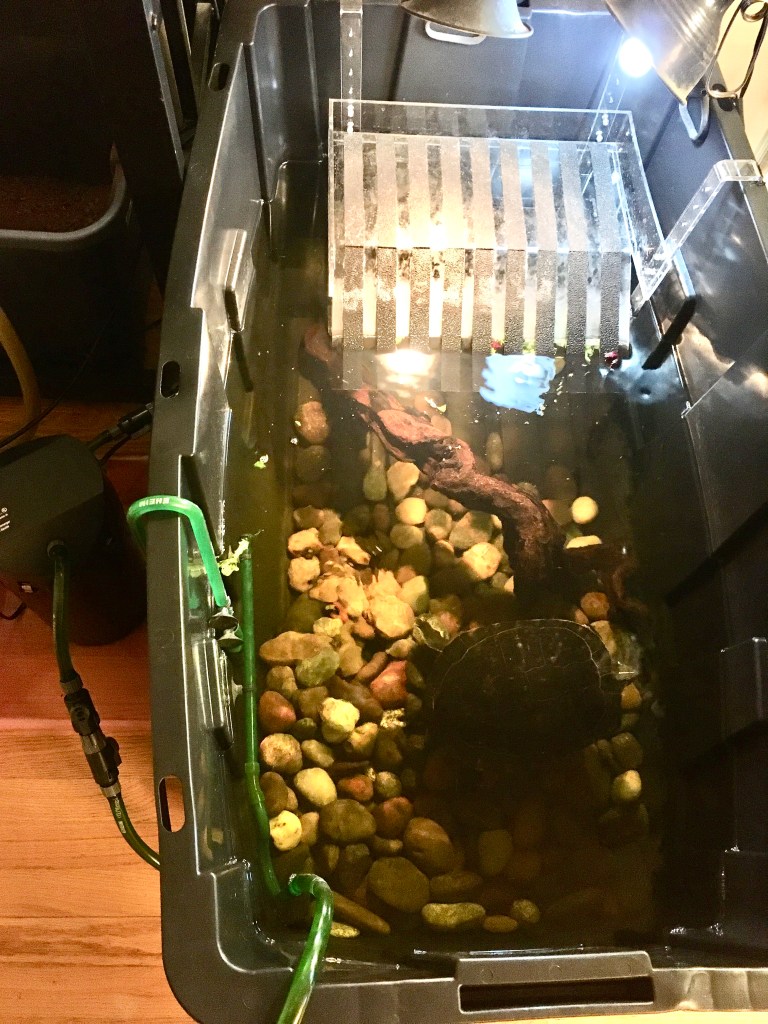
The filter that I chose for this setup is the Eheim Classic 350. While it doesn’t say it in the official specifications, this is one of the few filters I’ve found that don’t rely on gravity/the tank being above the filter in order to function. Those aquarium stands aren’t just for show; most commercial filters are built to sit below the tank and use gravity to aid in pumping water into the tank. They’re usually just not powerful enough to overcome gravity in both directions (into and out of the tank/filter) and are completely useless if the tank is on the floor. This filter I have found to be reliable, powerful, easy to clean, and reasonably quiet. The drawback is that it isn’t intuitive to set up and you’ll have to watch a couple of different instructional videos to figure it out. You’ll be measuring and cutting tubing and putting stuff together yourself. Also, I prime mine a little differently than he does in the video I linked. I’ve found that filling the canister most of the way with water after the filter media is in place is just as effective. Make sure the tubing is attached and where you want it in the tank, fill the canister, push the top on with some pressure to expel the remaining air through the tubing into the tank water, clip it securely in place, and then just plug it in and it works. It will blow bubbles for a minute or two, but you shouldn’t need to be sucking down aquarium water or bothering with those useless “priming kits” that some places sell.

One more thing to note is that pretty much all filters are designed for fish tanks and the makers don’t think that the output bar needs to extend very low into the tank. If you’re using an internal basking dock, your water isn’t coming right up to the edge of the tank, and if you set up your filter output bar the standard way shown in the video, you’ll have a loud, splashy waterfall spraying into (and possibly out of) the tank. To remedy this, you’ll have to adjust the length and positioning of the tubing and output spray bar. Note in the pictures above and below that I have the tubing extending over the side of the tank into the water rather than the curved hard plastic part of the output. It’s basically attached upside down compared to a regular fish tank with water that comes up to the top.
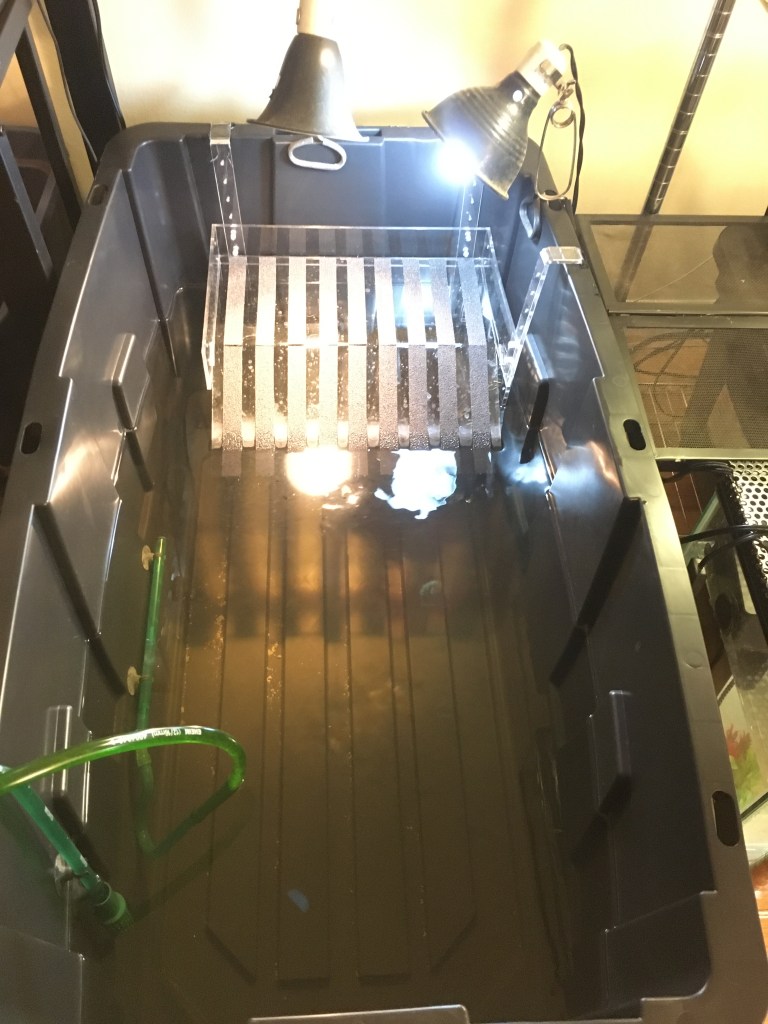
For this setup, I used the clamp lamps you can find in any pet or hardware store, a splash proof heat bulb from Zoo Med, and their compact fluorescent UVB bulb. For my smaller turtles in smaller aquariums, I love Zoo Med’s lamp stand and deep domed double hanging light (large and small), but it’s just not tall enough for an enclosure this size. If you want to build a mesh cover for the basking area and rest tube light fixtures on top of it rather than using clamp lights, you can, but that is outside the scope of this post.
In short, if you’re looking for an affordable housing upgrade for your adult red-eared slider or river cooter, give this quasi-DIY setup a try. Smaller turtles can fit comfortably in commercial tank setups, and extra-large ones like softshells and snappers will need a whole pond.

Wow, great information, esp. about ramps.
LikeLike